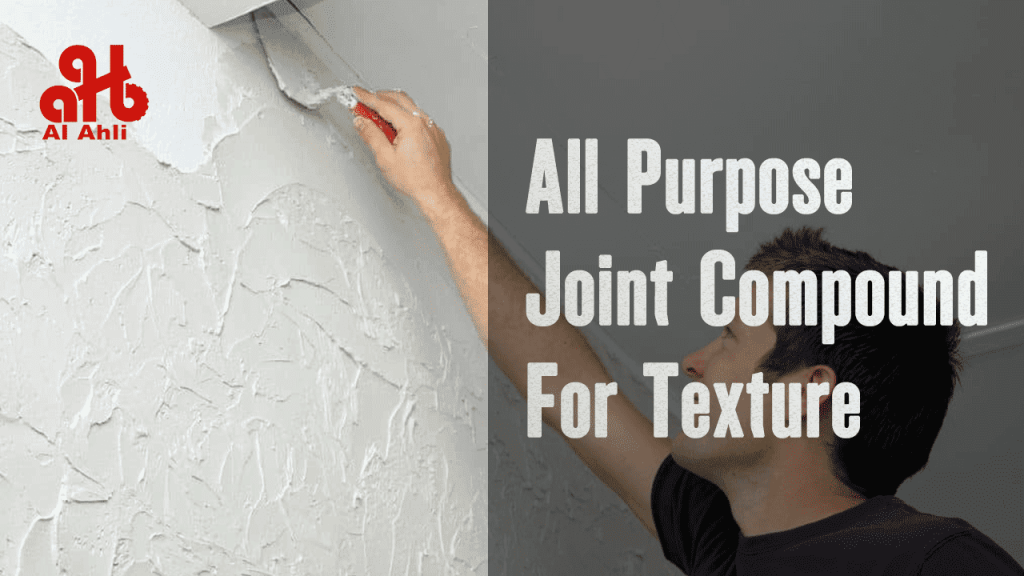
Using All purpose joint compound for texturing walls and ceilings is a common practice due to its versatility and ease of use. Here’s a detailed overview of how to effectively use this material for texturing.
Characteristics of All-Purpose Joint Compound
All-purpose joint compound is typically available in both pre-mixed and powdered forms. The pre-mixed variety starts with a thick, paste-like consistency, while powdered joint compound requires water to be mixed in before use. The choice between these forms often depends on the specific requirements of the project and personal preference.
Advantages of All-Purpose Joint Compound
Ready to Use: Pre-mixed joint compound can be applied directly from the container, making it convenient for quick jobs.
Versatile Texture Options: It allows for a variety of texture patterns, from smooth to coarse finishes, depending on how it is mixed and applied.
Good Adhesion: It bonds well to multiple surfaces, including drywall, concrete, and masonry, which is essential for creating a lasting texture.
Conceals Imperfections: The compound can effectively hide minor flaws in the surface, enhancing the overall appearance of the wall or ceiling.
Preparing the Compound for Texturing
Mixing
To achieve the desired texture, it’s crucial to mix the joint compound to the right consistency. Here are some key points:
Start Thick: Begin with a thicker mixture, as it provides better control for adjusting the consistency. You can always add water to thin it out, but once water is added, it cannot be removed.
Testing Consistency: A simple method to check the consistency is the “finger test.” After mixing, run your finger through the compound; if it folds back smoothly, it’s ready for use. If it retains a line, it may be too thick.
Frequent Mixing: Joint compound can thicken over time, so it’s advisable to mix it periodically during application to keep it workable.
Application Techniques
When applying the all-purpose joint compound for texturing, consider the following techniques:
Equipment Selection: Use a heavy-duty drill or a mixer designed for drywall mud to avoid damaging standard drills. The right sprayer is also essential; larger pumps are recommended for thicker materials.
Pattern Creation: Depending on the tool used (e.g., spray gun, trowel), you can create various textures. Experimenting with different techniques, such as swirling or dragging, can yield unique finishes.
Drying Time: Allow the compound to dry completely before painting or applying additional layers. Typically, a drying time of around 12 hours is recommended.

Best patterns with All purpose joint compound for texturing wall
When All purpose joint compound for texturing drywall and gypsum walls, there are several effective patterns you can achieve, each offering a unique aesthetic for walls and ceilings. Here are some popular techniques:
- Knockdown Texture
Description: This technique involves applying joint compound with a spray gun and then lightly knocking down the peaks with a trowel or knife after it partially dries.
Appearance: It creates a subtle, textured look with a soft, mottled effect.
- Orange Peel Texture
Description: Achieved by spraying a thinned joint compound onto the surface, then allowing it to dry without flattening it.
Appearance: Resembles the skin of an orange, with a fine, uniform texture that is less pronounced than knockdown.
- Stomp Brush Texture
Description: This method uses a stomp brush (a brush attached to a handle) to apply the compound, creating a unique pattern as the brush is stomped onto the surface.
Appearance: Produces a random, raised pattern that can be customized based on the pressure and angle of the brush.
- Slap Brush Texture
Description: Similar to stomp brushing, but involves a brush that is slapped against the surface to create a more pronounced texture.
Appearance: This results in a more aggressive, bumpy texture that adds depth.
- Smooth Finish
Description: For those who prefer a clean, modern look, applying the joint compound smoothly and sanding it down provides a flat surface.
Appearance: This creates a polished, seamless look that is ideal for contemporary designs.
- Skip Trowel Texture
Description: A trowel is used to apply the compound in a random pattern, skipping over areas to leave some of the underlying surface exposed.
Appearance: This creates a rustic, hand-crafted look that can add character to a room.
- Comb Texture
Description: A combing tool is dragged through the wet compound to create lines or waves.
Appearance: This technique offers a unique, linear design that can vary in depth and spacing.
Tips for Achieving Patterns
Experiment: Before applying to the entire surface, practice on a scrap piece of drywall to perfect your technique.
Control Thickness: Adjust the thickness of the compound for different textures; thinner applications may yield finer patterns.
Drying Time: Be mindful of drying times, as some techniques require the compound to be partially dry before manipulation.
Using all-purpose joint compound allows for a variety of textures that can enhance the visual appeal of your space. Each technique can be tailored to fit your design preferences, making it a versatile choice for any drywall finishing project.
Common mistakes to avoid when texturing with joint compound
common Mistakes to Avoid When Texturing Drywall With Joint Compound
When texturing drywall with joint compound, it’s important to avoid these common mistakes:
- Not Using the Right Tool for the Job
Different texturing techniques require specific tools. For example, using a roller is better for a stippled effect than a brush. Choose the right tool based on the desired texture.
- Not Learning the Proper Techniques
Mastering texturing takes practice. Watch tutorials, read instructions, and practice on scrap drywall before starting your project. Improper technique will lead to uneven results.
- Applying Texture Unevenly
Work methodically, starting in one corner and moving evenly across the wall. Check for missed spots as you go. Uneven application will create patchy, uneven texture.
- Letting the Compound Dry Too Quickly
Follow drying time instructions carefully. Rushing the process by skipping ahead too soon will compromise the final texture. The compound likely needs to dry overnight before sanding and painting.
- Not Properly Preparing the Wall
Clean the walls, patch any holes, and sand lightly before priming. Proper prep ensures the compound adheres well and the texture is smooth. Skipping prep can lead to flaws showing through.
- Mixing the Compound Incorrectly
The consistency should resemble thick pancake batter. Too thick and you may get a popcorn-like texture instead of orange peel. Add water slowly to achieve the right consistency.
- Failing to Apply Primer and Paint
Always prime the drywall before texturing. The paint will adhere better. After texturing, apply primer and paint as directed. Skipping these steps leaves the texture unfinished.
Texturing drywall takes skill, but following instructions, using the right tools, and avoiding these common mistakes will help you achieve professional-looking results. If you lack the time or confidence, it’s best to hire a local drywall texturing contractor.